How to Set Up and Use LIV
- Spencer McClure
- Mar 14, 2022
- 3 min read
Updated: Jun 24, 2022

VR games are great, but streaming them or making content for them can be tricky if you don’t know what you’re doing. Luckily, there’s a pretty easy way to add features and customization to your VR content creation, and that’s by using LIV. LIV is a software that adds a lot of different tools to your VR content creation, from customizable avatars to a stream chat that you can see while you’re in the headset. Here’s how to install LIV, and what you need to get the most out of your new VR content creation companion.

First things first, let’s go over how to install LIV. This part is simple, just navigate to LIV’s page on Steam, and click install. From here, make sure you launch SteamVR, then go ahead and launch LIV.
Once you’re in, there’s a bunch of different tools to mess around with. One of the easiest and most important tools you’ll want to check out if you stream to Twitch is the LIV StreamerKit. Here you can sync your Twitch chat and alerts with Liv so that everything will be displayed in the headset. In the chat tab, the most important thing is the chat position, which is on the second tab in the chat section. Here you can adjust where the chat pops up in your headset. There are a couple of presets, but you can also adjust them as necessary. The alerts tab on the left is the other important thing to note. Here, you can save any chat or alert settings you have selected for specific games. For instance, the chat works really well in a fixed world position in Beat Saber, but not as well on Until you Fall, so you could assign different chat settings to unique profiles for both games.
The capture tool on LIV is probably the most used part of the software. This is what lets you put yourself or your avatar in the game for your videos and streams. The easiest way to set this part up does not even require a camera or green screen. All you have to do is set the LIV camera to LIV Default, and then put the headset on. If you look down at your feet, you’ll see a LIV logo, and if you point to it for one or two seconds, it will bring up options for the viewfinder and camera. Just locate your camera and viewfinder in your headset, and then you can drag them around and adjust them exactly how you want.

LIV will start you out with a couple basic avatars, but you can make your own using the LIV avatar creator on their website, or download avatars via the avatars page on ModelSaber.
To put yourself in the game, there’s a few extra steps. First you need to set up your own camera and green screen in a room with plenty of space. Make sure there’s enough room for your camera to see your full body, without cutting off your head or feet. After that, select your camera under the camera tab on LIV.
After setting up the camera, you’ll need to calibrate it so that your position on the camera matches your controller position. Hit the calibration button, and you’ll be able to see your camera in your headset, with red crosses on it. For the first step, line up your controller directly with the red cross, as close as possible to the camera, then click the trigger. For the next two, take as many steps back from the camera as you can, then repeat the process for the cross in the top left and bottom right.
After this step is complete, LIV should show you how a copy of your controllers overlaid over the camera. These controllers are where your sabers, weapons, or anything else will be while you’re playing. If the controllers look off, you can adjust their position and latency to sync them more closely with your hand movement.
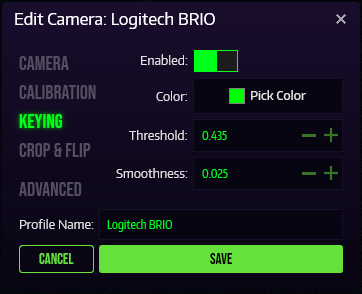
Next, you might need to adjust the threshold to make sure your green screen is removed without cutting out any parts of your body. If you still see a green outline around you, or a green glow on your skin and hands, you can use a despill LUT to correct those green tones into more natural colors.
For the last step, make sure you reset your standing position in your headset so that you get the angle you want to be portrayed in the game. For instance, standing at a 45 degree angle away from the camera will show both you and the notes in Beat Saber. After that, just pick your game from the list of supported LIV games, and you’re ready to go.
For some good examples on how to use LIV, make sure to check out our video on VR rhythm games where we showcase gameplay using LIV.


Comments